
FRESH HOMEMADE RICOTTA IN 6 SIMPLE STEPS!
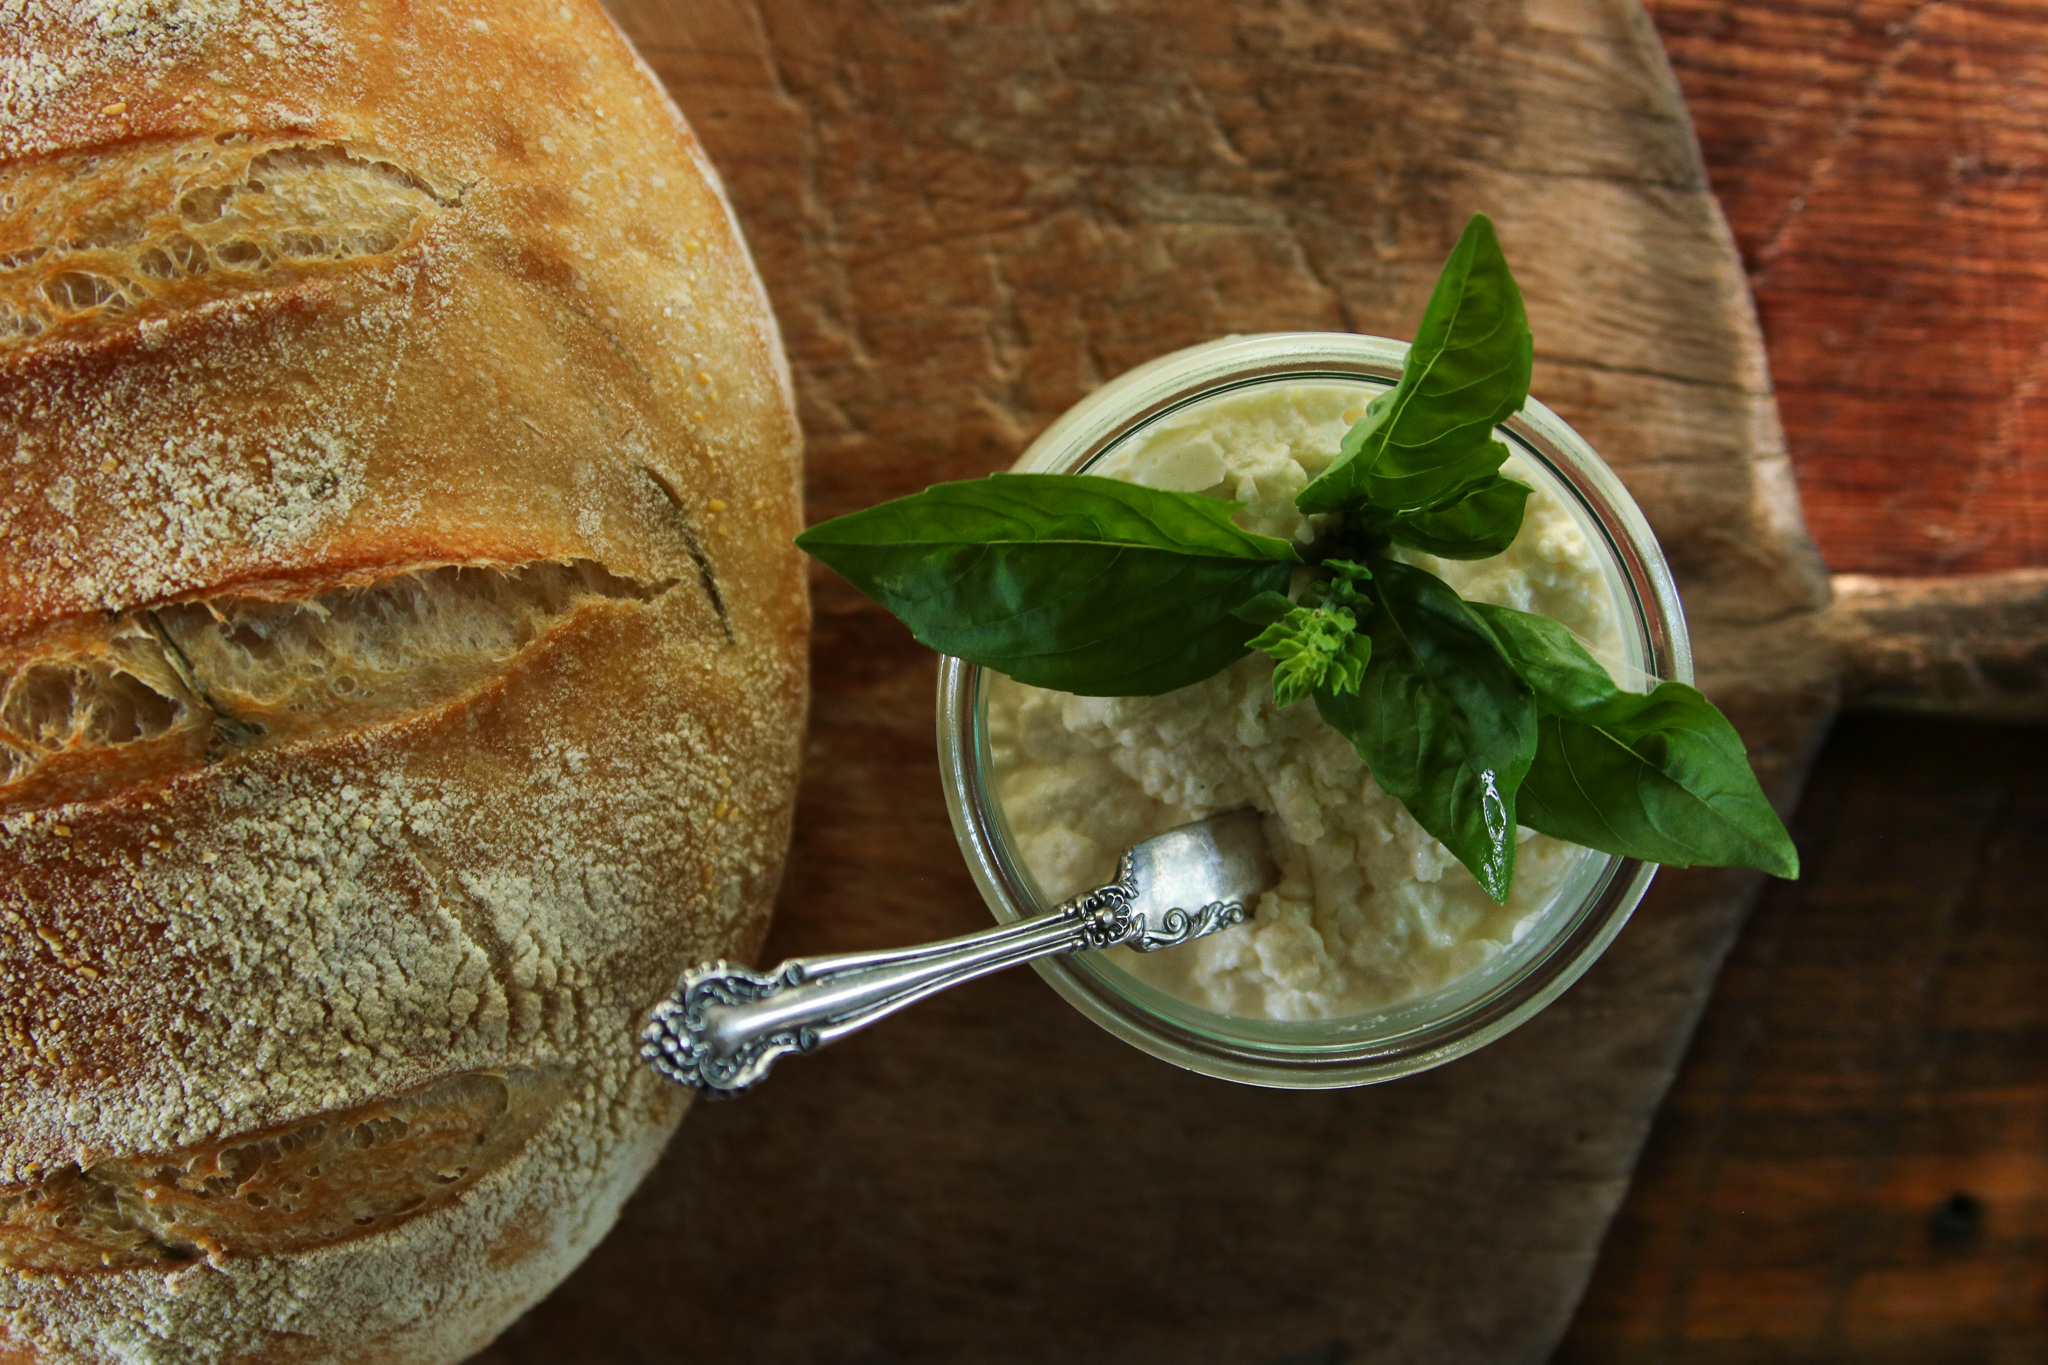
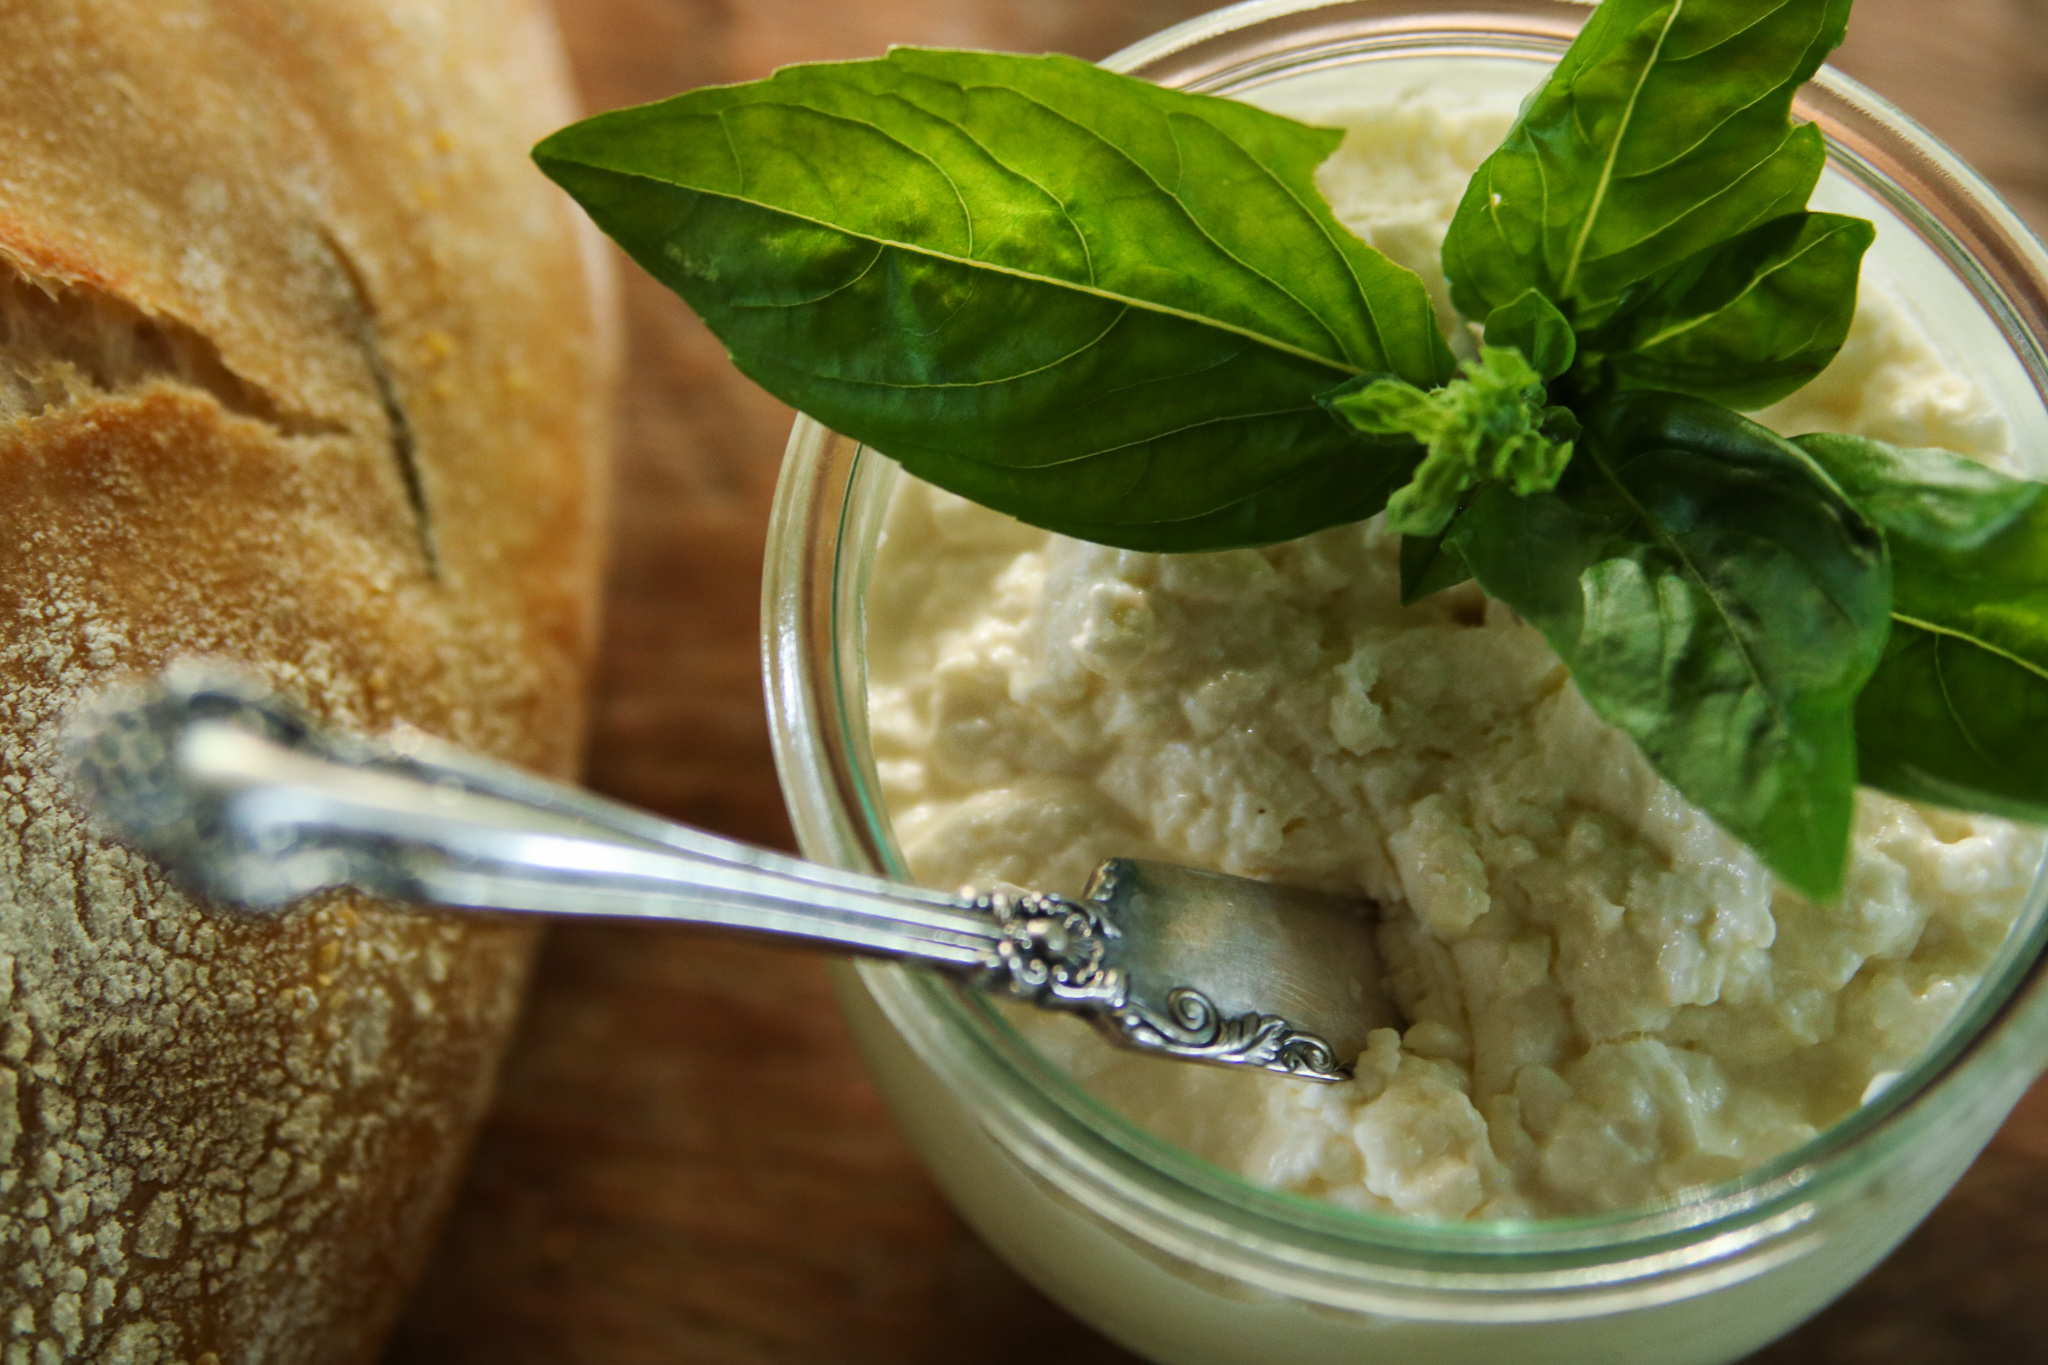
Fresh ricotta is one of our most favorite dairy products! One of the reasons we love it is its versatility. Besides standard applications—delicious dollops atop pizzas and pastas—we love ricotta on a cheeseboard for your spreading pleasure, and it’s a wonderful baking filling for those toothsome layer cakes and tarts.
The problem, however, is that unless you have leftover whey from cheesemaking, you can’t actually make true authentic ricotta. But don’t fret! You can make this simple and pretty darn close “ricotta-like” recipe that will certainly taste just as delicious.
A few years ago, we took a local cheese-making class with our friend and talented chef, Cheryl Perry of Red Barn Studio. Cheryl is a former NYC restaurant and bakery owner. A culinary instructor for more than 20 years, she founded Red Barn Studio in 2018, offering hands-on classes, workshops, and special events focusing on slow food, sustainability, and the bounty of the lower Catskill region. She is also one of our guest chefs for our Terrain & Table dinner at the Stone Ridge Orchard on August 21st. Among other cheeses, Cheryl taught us this great recipe that we now use on the regular. A helpful tip to this recipe that will make all the difference, is a good quality local whole milk (not UHT pasteurized). See the simple recipe below and happy cheesemaking!
| Servings |
ounces
|
- 3 cups whole milk Not UHT pasteurized
- 1 cup Heavy cream
- 3 tablespoons Freshly squeezed lemon juice or white vinegar
- 1/2 teaspoon salt
Ingredients
|
|
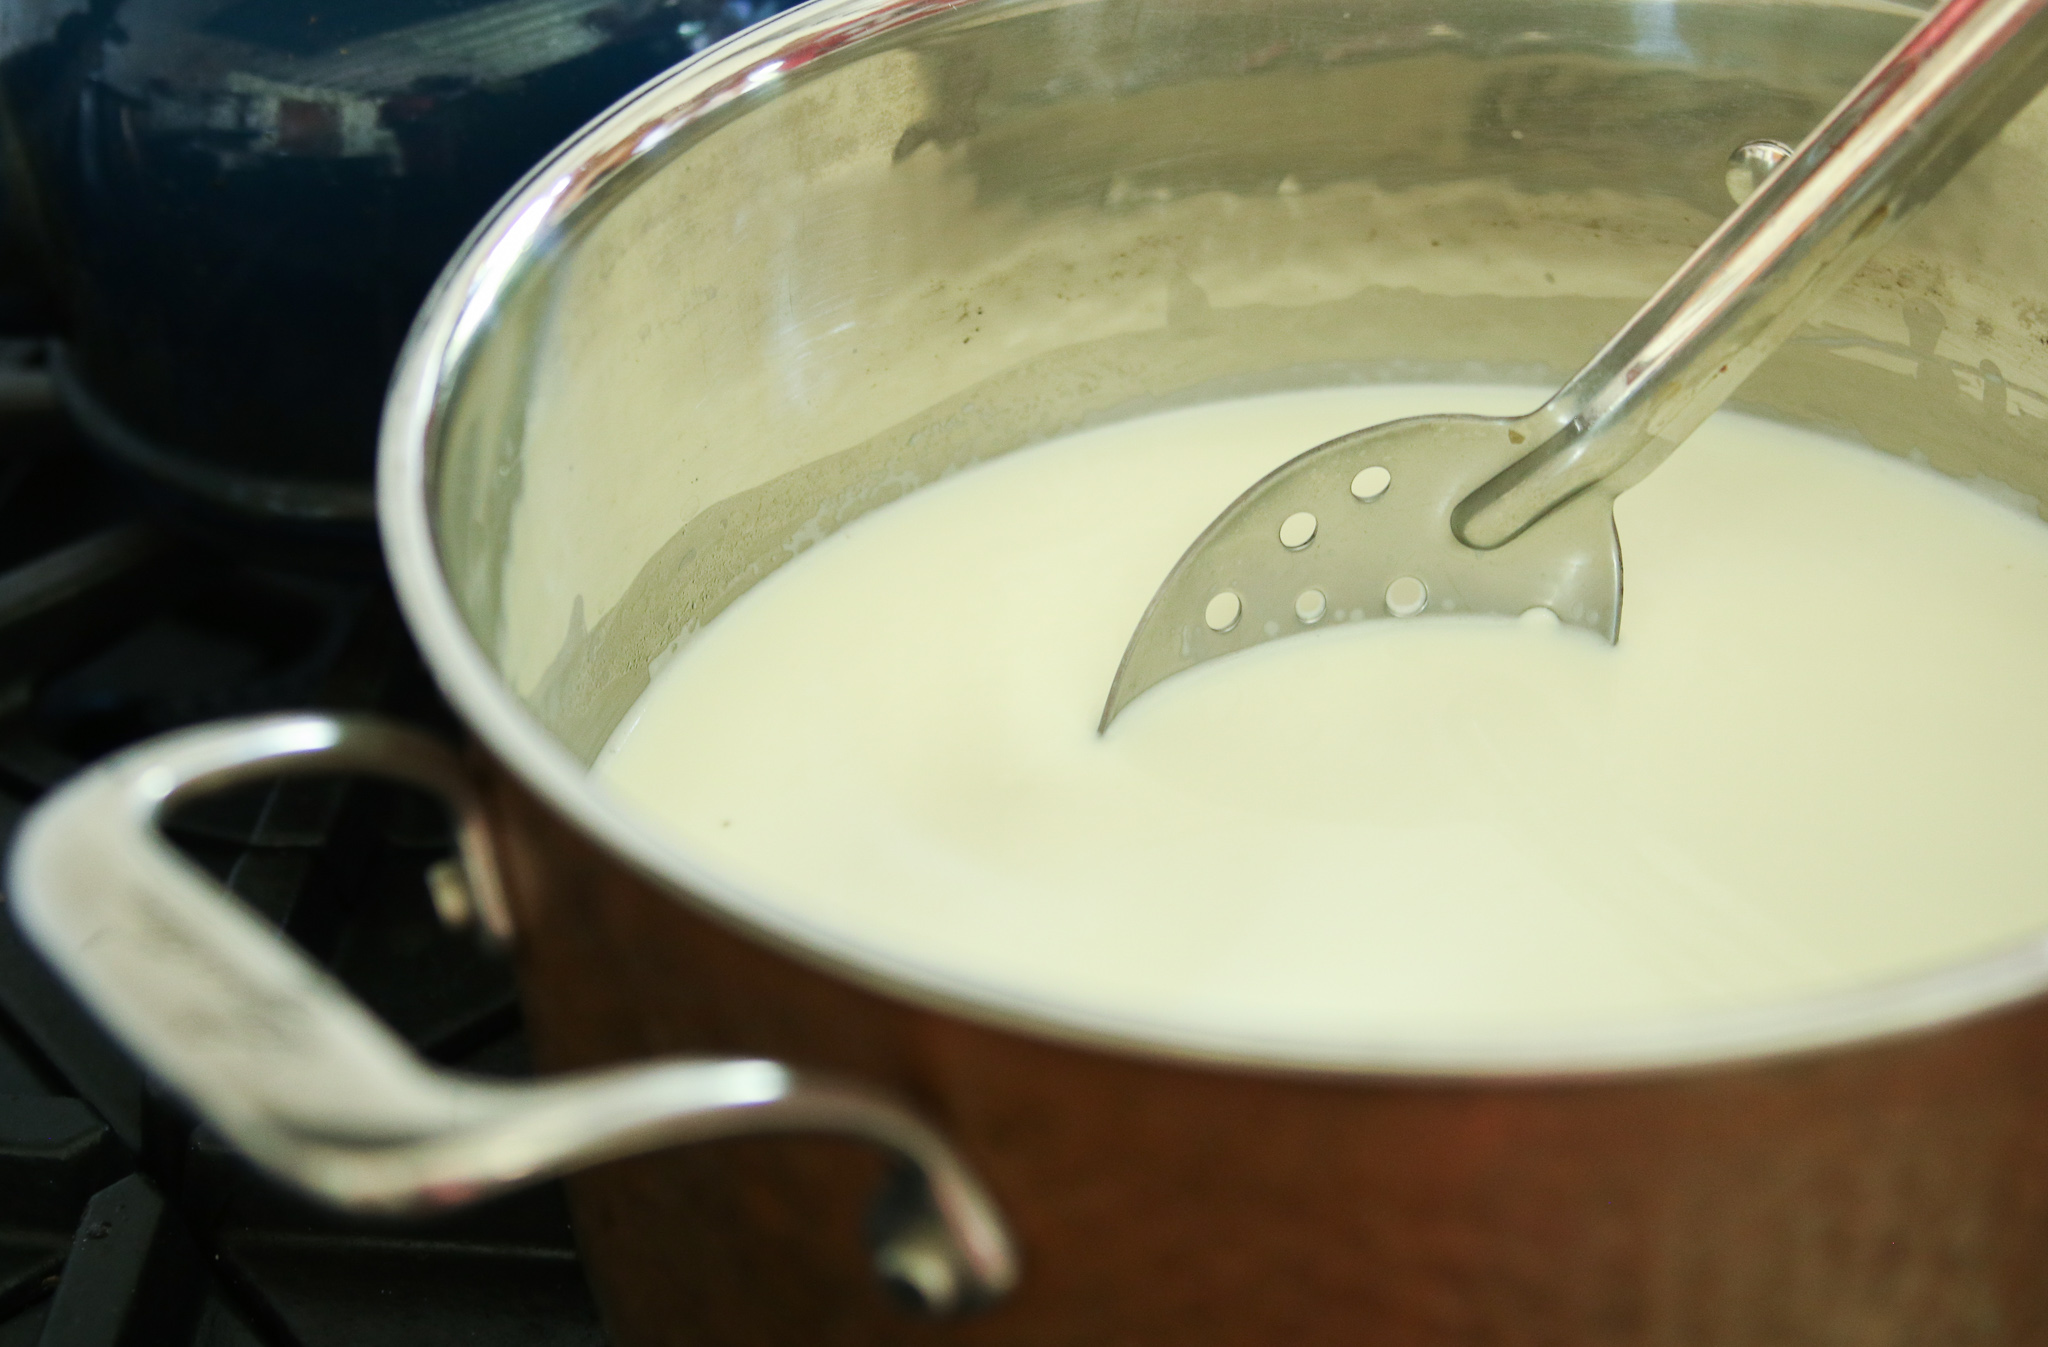
- Pour the milk and cream into the saucepan and set over medium heat. Bring the milk to a bare simmer— just below the boil at around 200°F. Stir occasionally, scraping the bottom of the pot to make sure the milk doesn't scald. When ready, the mixture will look foamy and steamy.
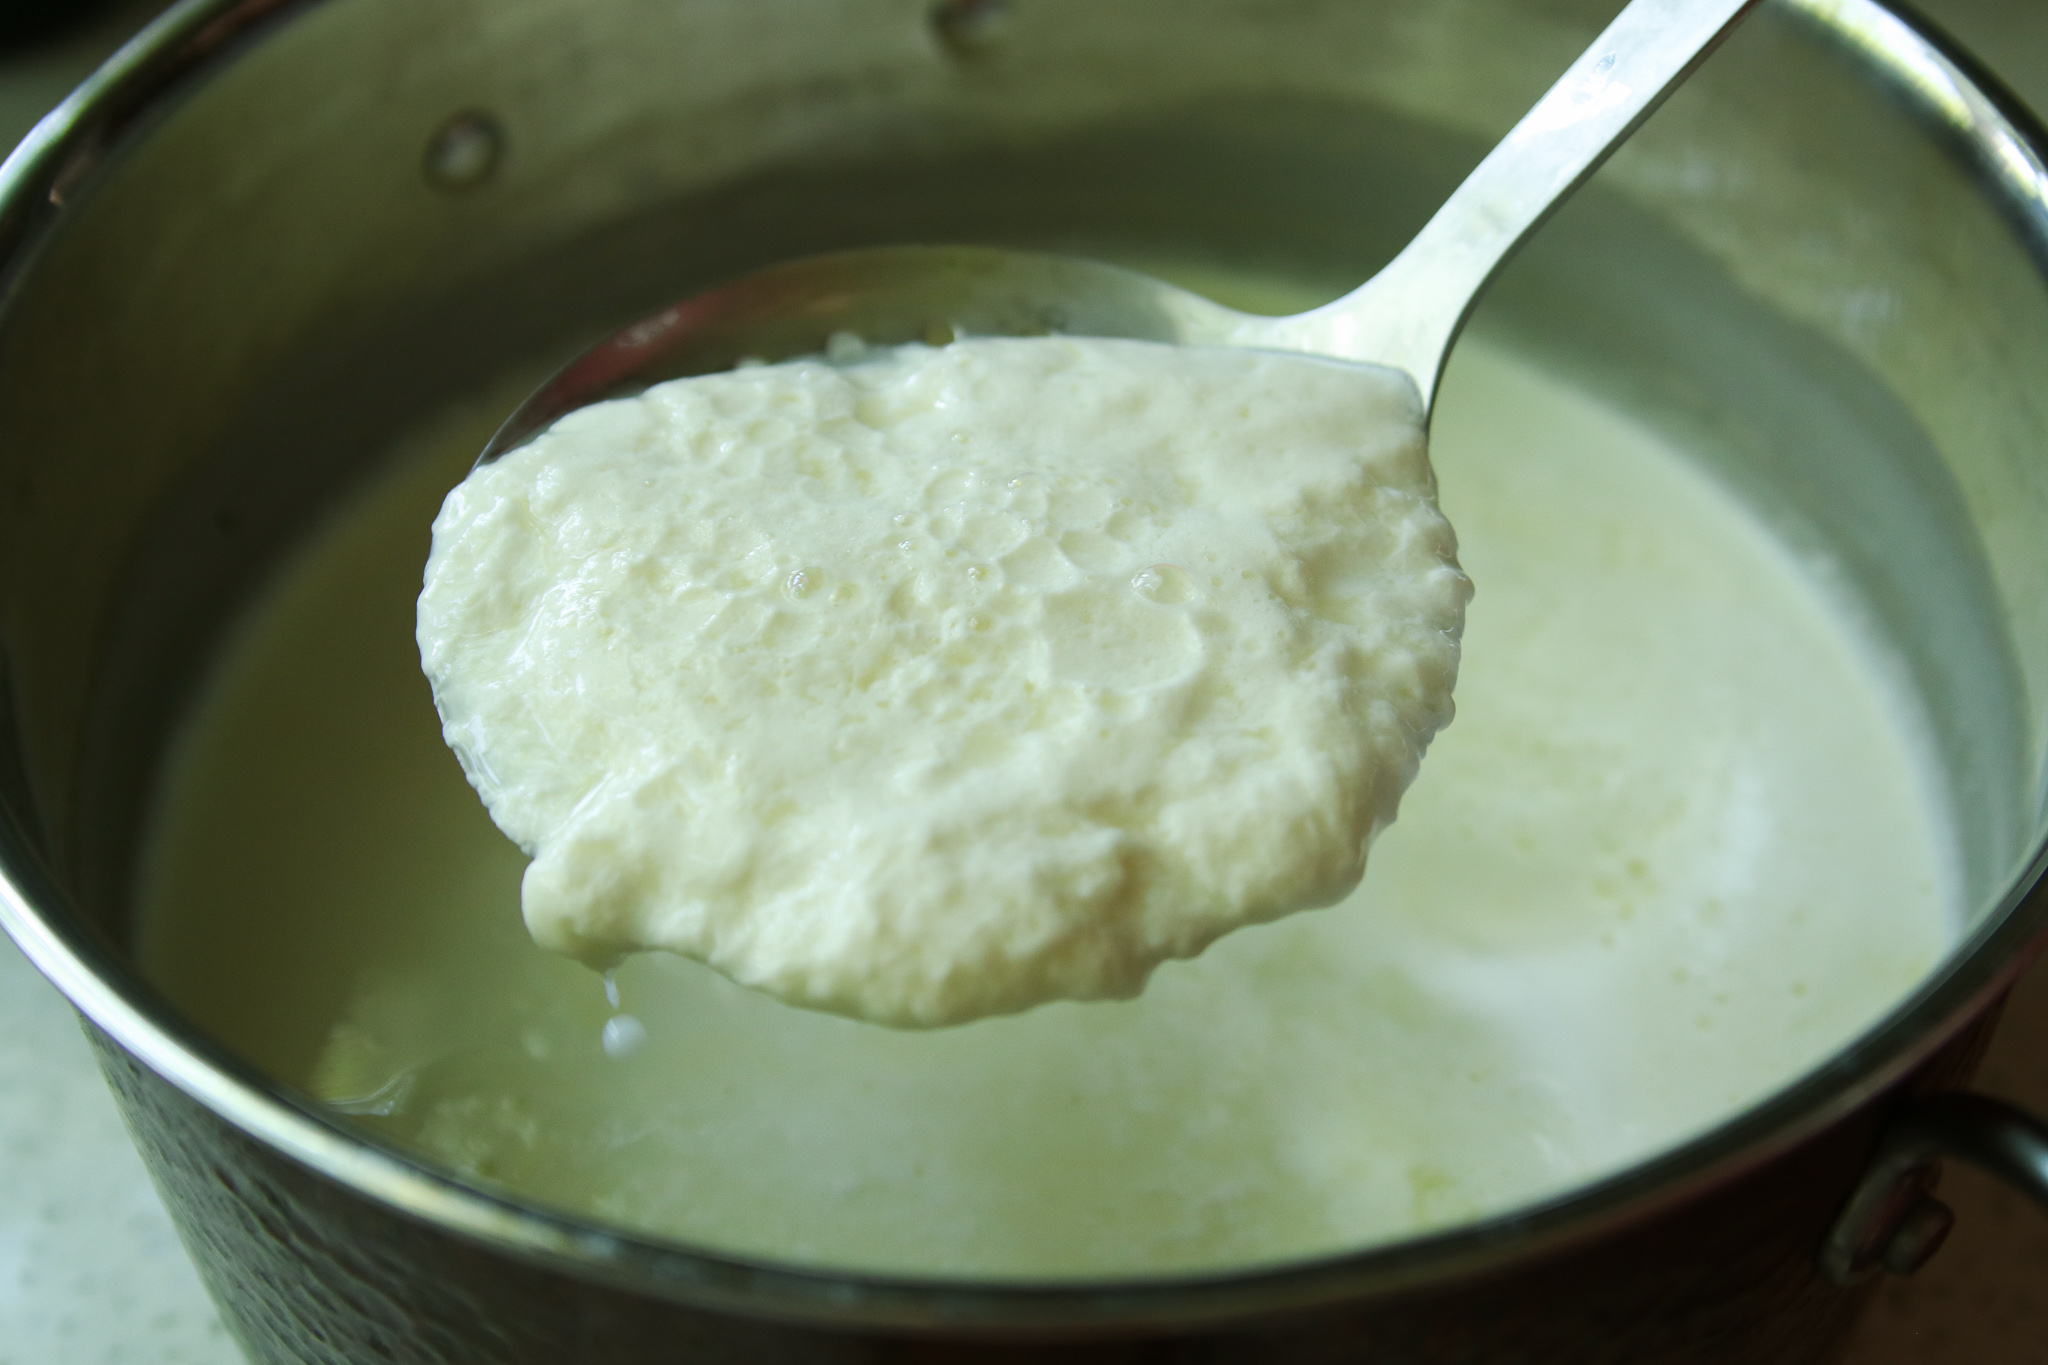
- Remove the milk from the heat and stir in the lemon juice. The milk should begin to curdle immediately, but it's okay if it doesn't.
- Cover the milk and let stand for 10 minutes to give the acid time to completely separate the curds and whey. At the end of 10 minutes, the curds should be completely separated and the liquid should look yellow and watery. If the milk hasn't separated, try adding another tablespoon of acid. If it still won't separate, check your milk and be sure you are using non-UTH milk; otherwise it won't separate.
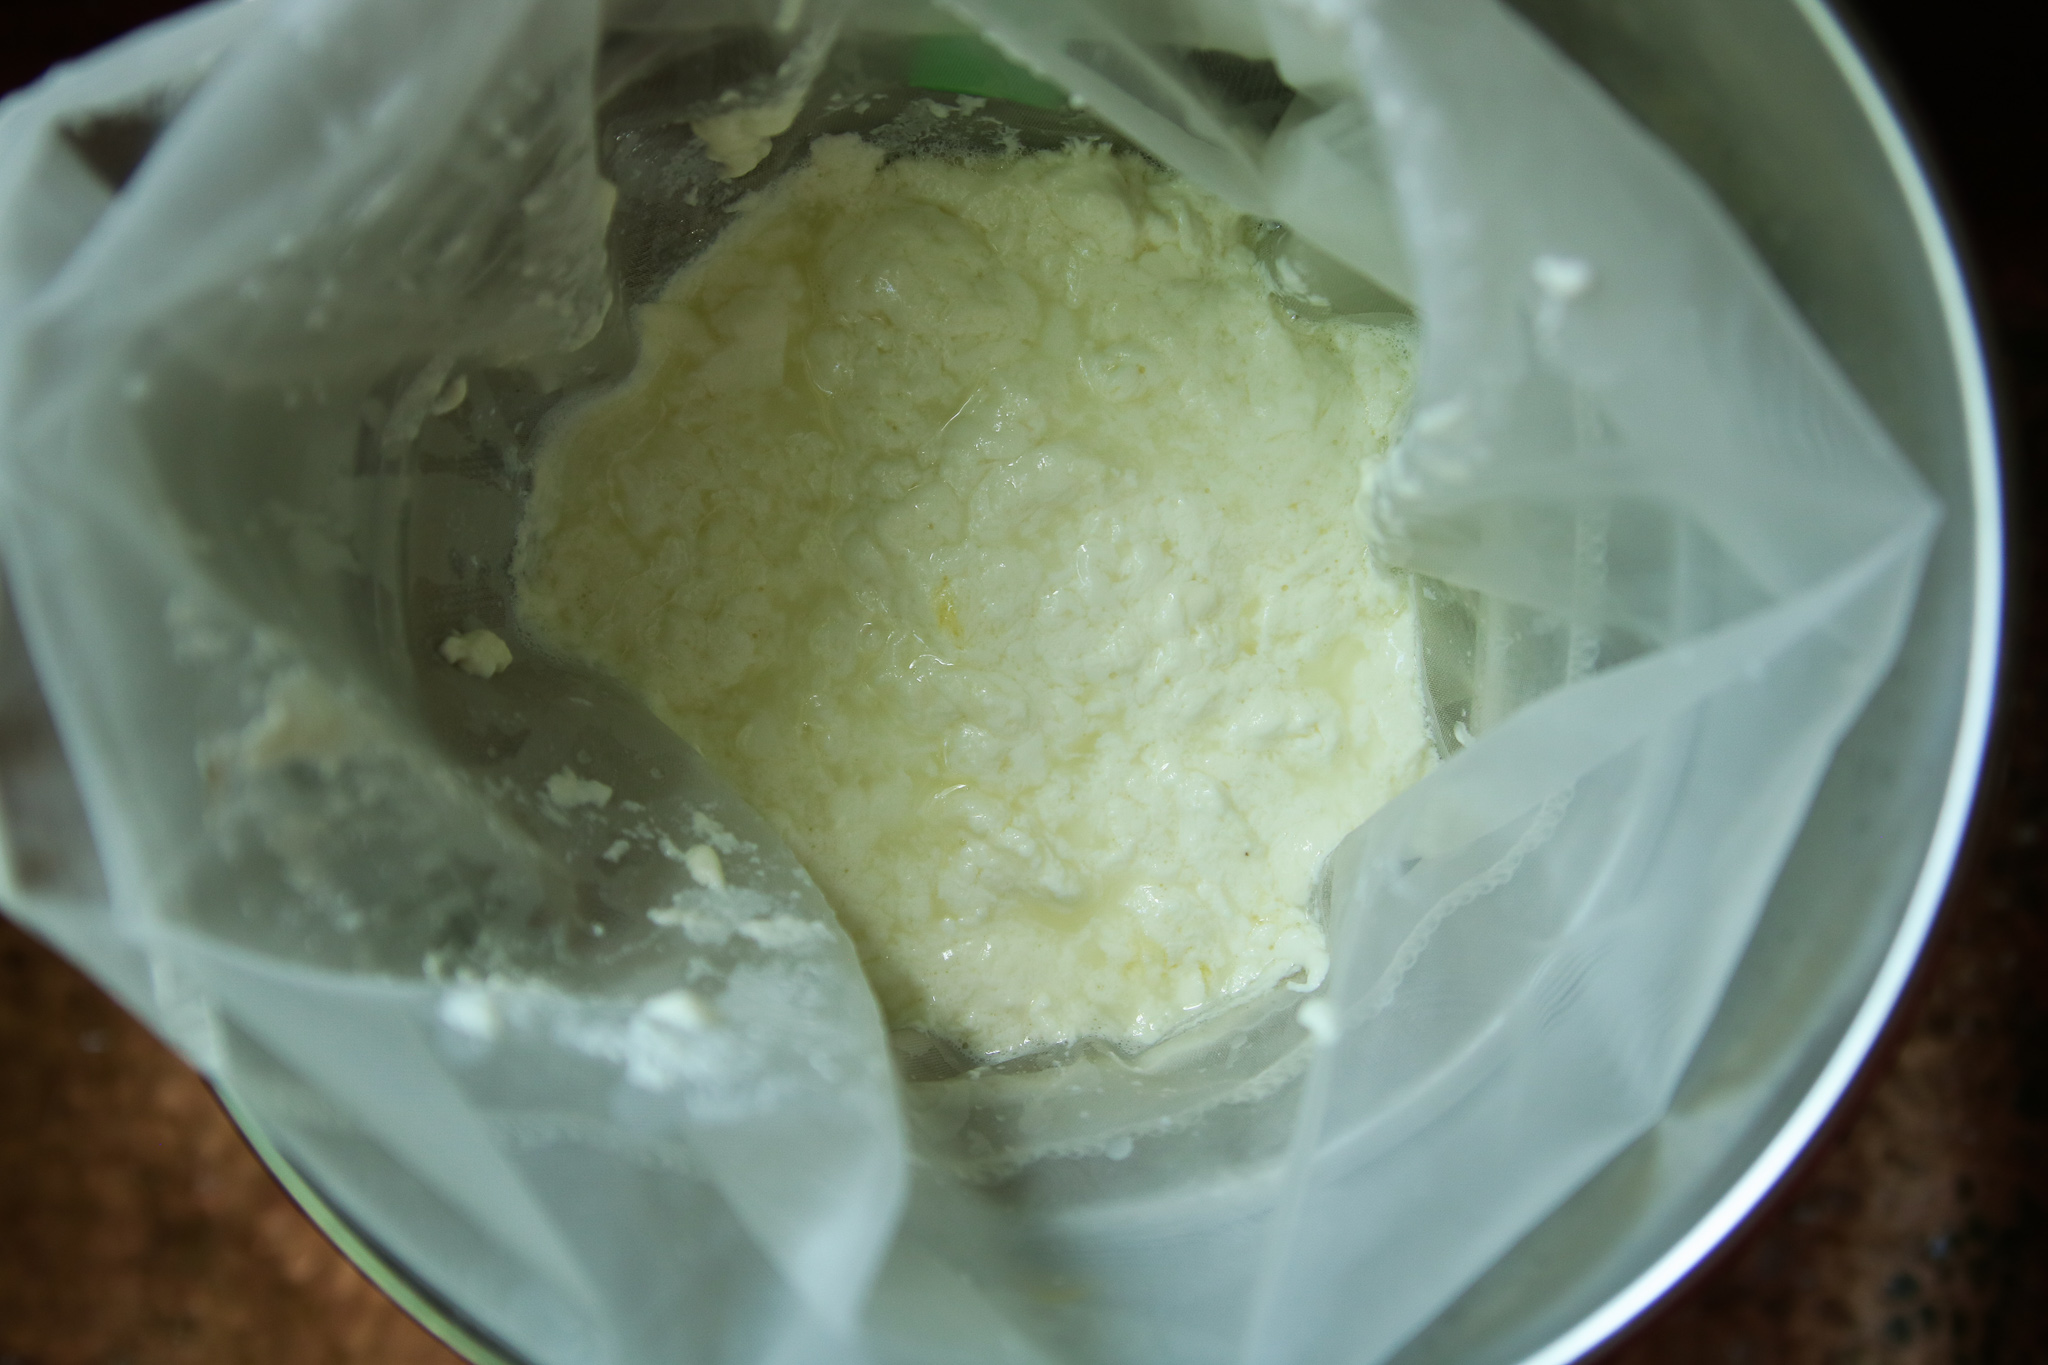
- Set a strainer or colander over a mixing bowl and line it with cheesecloth, a nut bag, or other straining cloth. Carefully scoop or pour the curds into the strainer, letting the whey collect in the bowl beneath.
- Gather the cheesecloth in your hand and gently squeeze to remove the excess whey.
- Open the cheesecloth and sprinkle 1/2 teaspoon salt over the curds. Stir gently and taste. Add more salt if desired. Refrigerate the curds until ready to use.